|
What is it?
You may have noticed that your child’s injured arm rests in a ‘thumb-down’ position, (Figure 1), while the other arm rests ‘thumb-up’. The Sup-ER splint has been designed to help support a ‘thumb-up’ position by maintaining the length of your child’s arm and shoulder muscles (Figure 2).
Just like your child, the splint is one of a kind! It is comfortable, easy to use, removable, and can be adjusted for growth. The splint is made of a lightweight plastic material shaped on your child’s arm, and a special strapping system.
How do I put the splint on my child?
Part 1
-
With the palm facing up, apply the plastic splint (as labeled) to the inside of arm/hand (see Figure 3).
- With the palm still facing up, apply the white elastic strapping. Start with the end pointing into the palm (Figure 4), looping around the hand and through the thumbholes, twice.
- Continue to wrap the strapping up over the arm splint (Figure 5).
- Overlap by half the strap width.
- Apply gentle even tension.
Goal: The elastic strapping helps reinforce the palm-up position.
Part 2
-
Apply the waistband, pulling the Velcro strap up between the legs, just like a diaper (Figures 6 & 7).
- Gently turn the shoulder outward (thumb pointing out, Figure 8).
- Attach the Velcro straps (as labelled) at top of the arm and elbow, securing to back of waistband (Figure 9).
Note: Always position the shoulder with your hands. Do not use the strapping to pull the shoulder into position.
Goal: The strapping supports the outward shoulder position.
When should the splint be worn?
- 22 hours per day to start.
- We will review your child’s progress monthly. Reducing the time required in the splint will depend on your child’s overall development, and arm strength and flexibility.
- Remove the entire splint twice per day, for one hour each in morning and evening.
- Use these breaks for bathing, stretching exercises and play time.
- Remove the strapping for Part 2 when your child is eating or traveling in a car seat.
What do I need to check?
- Check finger color on a regular basis (especially as your child is getting used to using the splint).
- Fingers that are dark purple or white mean there is poor blood flow to the hand, and the strapping may be too tight.
- Remove the splint immediately; allow color to return to normal, and then reapply, checking strap tension.
- Check the skin for redness or irritation, whenever the splint is off.
- Redness that disappears within 20-30 minutes is acceptable.
- Contact your therapist if there is any persistent redness or irritation.
How long will my child need a splint?
We recommend use of the splint for some portion of the day and/or night (as directed), for the first year of your child’s life.
Should I clean the splint?
Yes! A clean splint helps keep skin healthy.
- Wipe the arm splint every day with a damp, soapy cloth.
- Hand wash the waistband and strapping, as needed. Hang to dry.
What else should I know?
- Do not leave the plastic splint near any heat source – it may lose its shape and no longer fit properly.
- Be consistent. Your child will adjust to the splint more quickly if worn regularly.
- Do the stretching and play activities, as recommended. The splint does not replace these.
- More information about brachial plexus injuries, stretching exercises, and play activities are located in your information package. The package also includes more pictures and a splint use log.
|
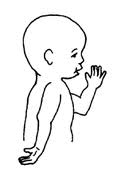
Fig. 1: Arm position.
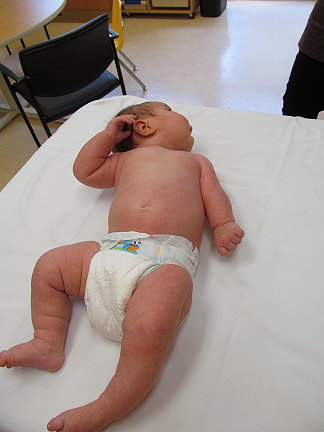
Fig. 2: Sup-ER Splint.
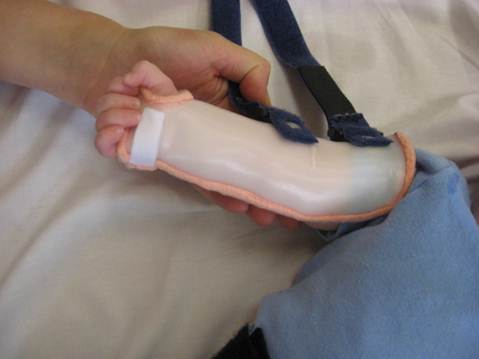
Fig. 3
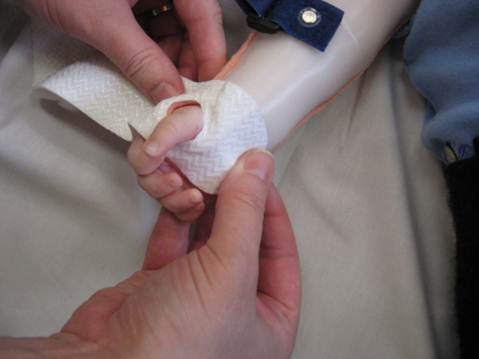
Fig. 4
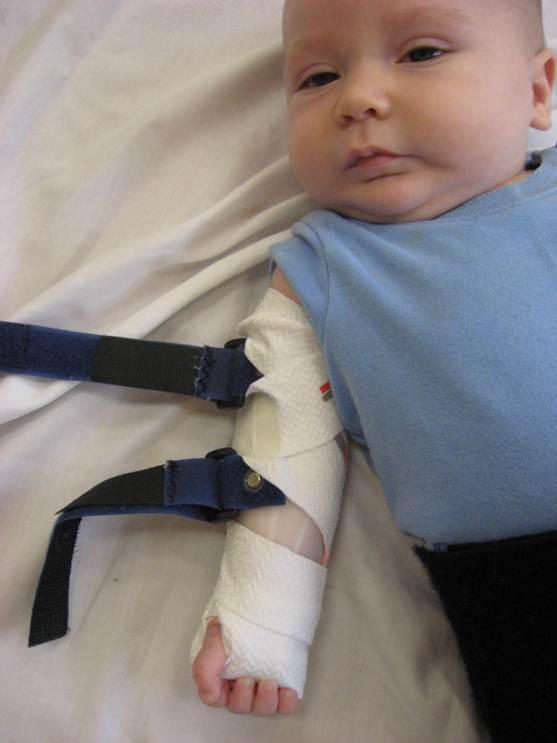
Fig. 5
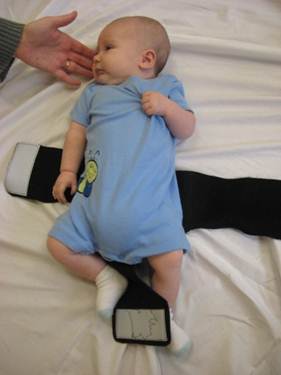
Fig. 6
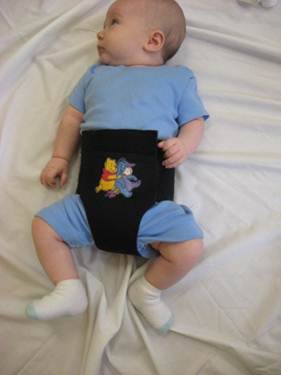
Fig. 7
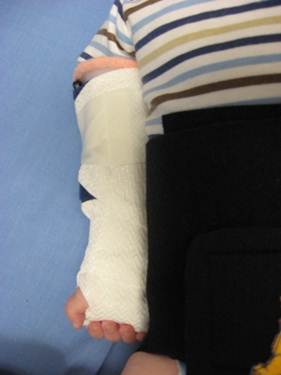
Fig. 8
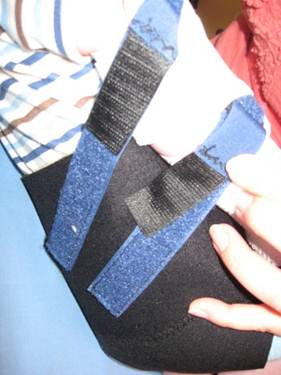
Fig. 9
|


